• Home
  • Services
  • Our Team
  • Projects
  • Blog
  • Contact
Menu

VESSOUL DESIGN

Street Address
City, State, Zip
Phone Number
Atlanta-based interior design + styling

Your Custom Text Here

VESSOUL DESIGN

  • Home
  • Services
  • Our Team
  • Projects
  • Blog
  • Contact

Styling your stairs

April 28, 2022 Katie Carpenter

These stairs leading to the basement got a cheerful lift! (Photo by Joy Ludwig)

When we bought our house, we loved all the modern appliances. It was a flip - but they did a pretty good job with the finishes. However - everything was pretty much black and white. I’ve realized my style needs a little more variety, so I’ve slowly been adding more color in.

Including - these stairs! One of our guest baths is downstairs and so is our laundry room, and I wanted to make people (and myself) smile as they came back up. It’s kinda like a hidden secret, because you don’t see them on the way down, just on the way up. Shh!

This was so easy and cheap to do.

Before. Dull and basic.

I wanted to get a variety of paint, but learned the smallest Sherwin Williams would sell would cost be over $20 a COLOR. But - the salesman did give me a tip. Lowe’s down the street sold samples that were small and much cheaper. And he was right - each color was only $3.99!!

These are the colors I chose.

It was important to me that I specifically got “happy” colors. So I went with Peach Blossom, Youthful Coral, Loveable, La Luna Amirilla, Neighborly Peach, and Afterglow.

I cleaned the steps before painting (cause we have three animals).

Tip: if you’re not sure of the order of colors, lay out the caps or do a sample streak to see how you feel about the combination! I played around with it for a bit before I landed on the color order. Check out a quick little video on my project below.

Overall, this project probably took me a total of 2 hours and cost under $30. Definitely worth it!

(Stair treads are from Wayfair. Also be sure to get some carpet tape so they don’t slide!) Linking here:

Carpeted Stair Treads

Carpet tape

1 Comment

Boho-Tuscan Patio Refresh with Stenciling

April 25, 2022 Katie Carpenter

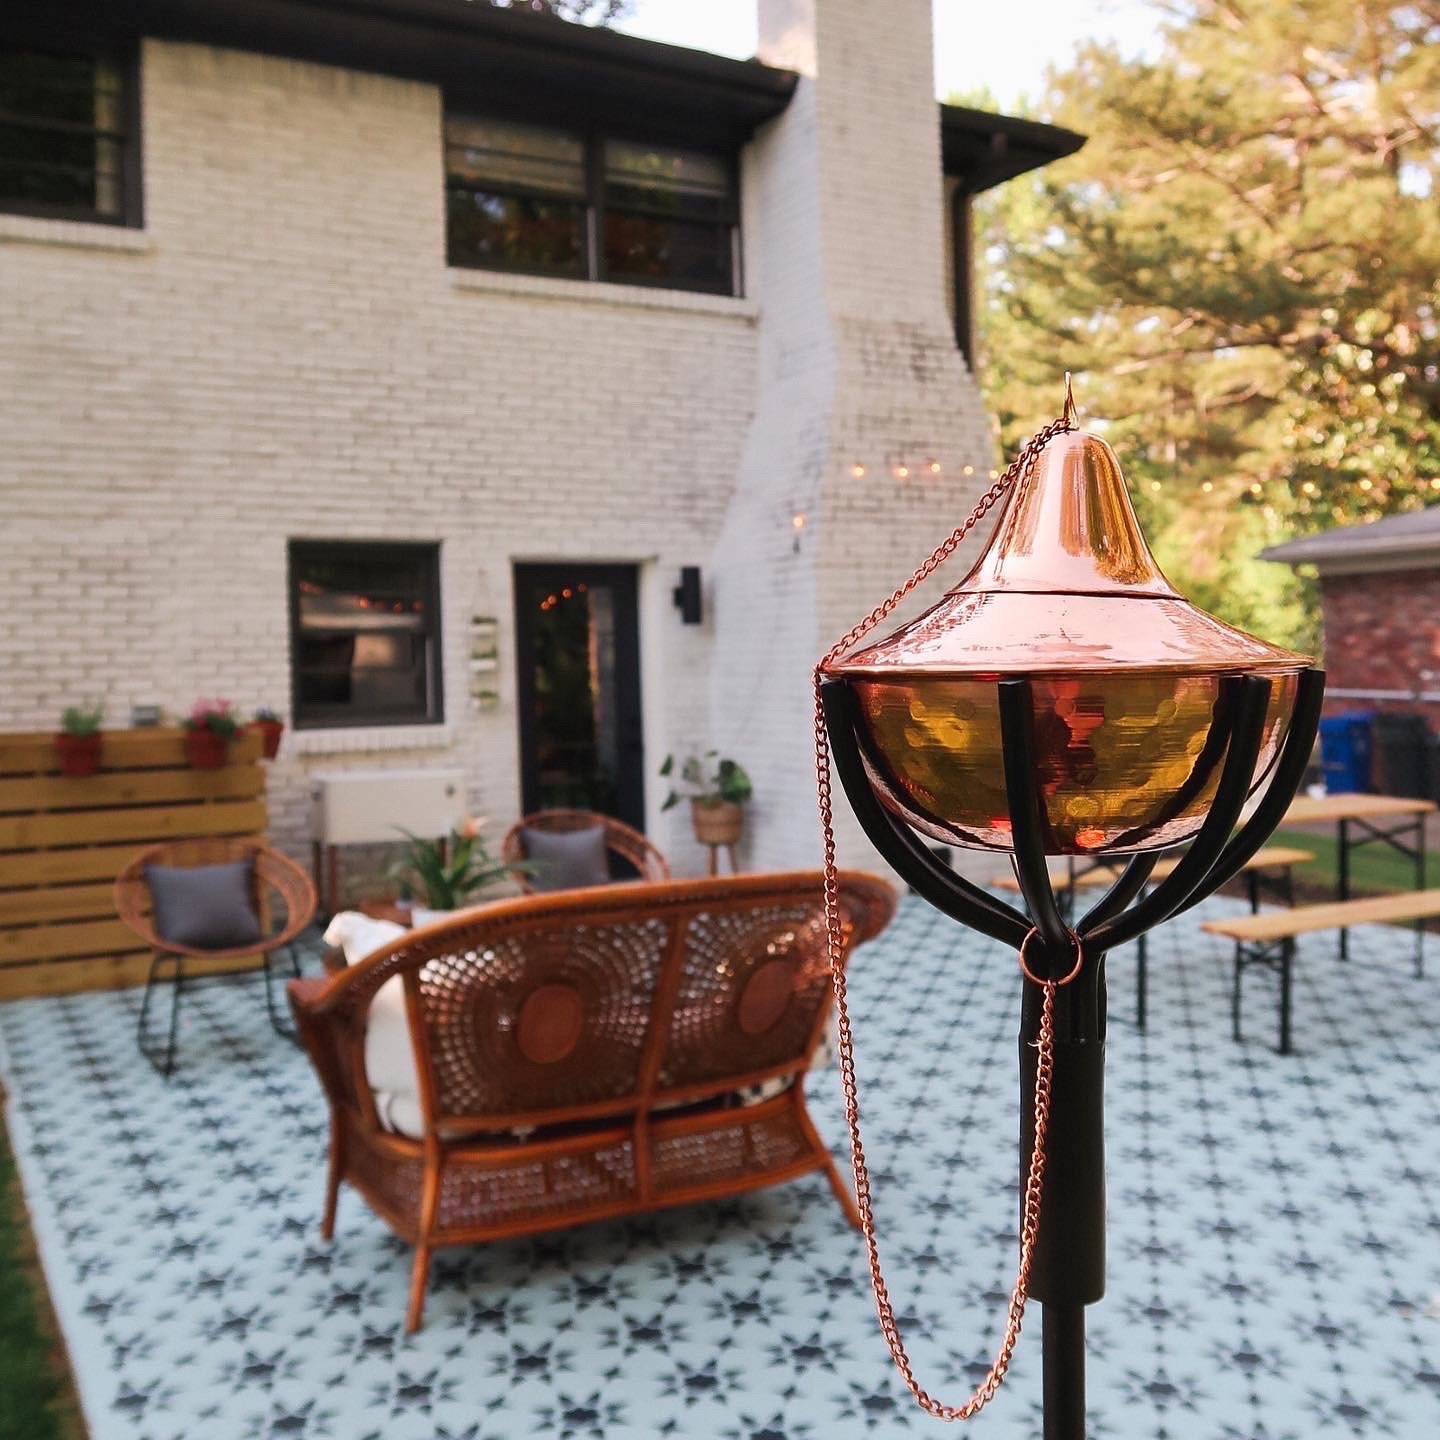
Thrifted furniture + paint make the biggest impact on this patio!

An ugly concrete slab is especially uninviting. After living in this house for a year, I can safely say we NEVER used this space. Inspired by stenciling and the look of faux tile, we completely transformed this place into a tuscan dream spot, all for about $1500!

BEFORE. What an eyesore.

CLOCKWISE FROM TOP LEFT: Behr Concrete and Garage Epoxy in “Barrier Reef,” Stencil brush, Amazon three tier hanging succulent pots, rollers for rough surfaces, Rust-oleum Concrete and Garage clear finish topcoat, Royal Design Studios Stencil in “Supernova,” Macy’s Marley Indoor/Outdoor 3 piece Bistro set, deck boards for the HVAC unit cover (Lowe’s/Home Depot), Style Well 80 Qt. White Cooler with Light Brown Woodgrain.

Sadly, I didn’t take a lot of “during” photos.

But - for stenciling:

  1. Level out your concrete if you need to, repair cracks as best you can (we luckily didn’t need to do this.”

  2. Pressure wash/scrub concrete with outdoor concrete or deck cleaner. Let dry.

  3. Leaf blow/sweep to be sure the area is free of debris. Use a rough nap roller to paint first coat. Let cure the amount of time suggested.

  4. Leaf blow/sweep again. Do a second base coat. Fill in any areas that the concrete is showing through with a thick amount of paint to be sure it’s getting into the crevices. Let dry.

  5. Stencil time! Start from a corner. Don’t use a lot of paint on the stencil brush - I like to dab through a few of them with a dot of paint and then go back through to spread it out. If you have too much paint, it will bleed under and your design will not look sharp! But if there are mistakes - don’t fret. You can always touch-up or re-do them.

  6. I try and start the stencil in the direction I’m moving - ie, if I’m moving left, that’s the direction I’ll start because you want it to dry first. Overlap the design - I learned that the more I overlapped, the better the design looked but the longer it took! So you have to figure out what works for you. :) Let it dry.

  7. Be sure to sweep/leaf blow a final time. Then use a rough roller to do a final clear topcoat.

  8. Enjoy!!!

HVAC unit cover was built using deck boards.

For the HVAC unit cover, my dad ended up building this. He was a Carpenter for years, and I showed him a Pinterest photo and he made it come to life. He used deck boards and screws to make this - weather treated wood was obviously important since this unit is outside.

Do be cautious about covering the HVAC unit - it does need as much air as possible. We have about 10 inches in between the unit and the cover and there are also spaces between the slats. It simply sits on top of the concrete and slides out if we need to access it.

I bought plant hangers and terracotta plastic pots from Amazon to complete the look!

The copper fire torches were bought on Wayfair!

We already had the lights and attached them with screw-in cup hooks and a masonry drill bit. The bench is a Beer Garden Bench from Amazon, only $200, is collapsible, and can seat 6 adults!

The cooler was the perfect party addition - we put child friendly drinks on one side and adult beverages on the other! And no one was treking through the house to grab a drink.

Where to buy it:

Stencil

Paint

Cooler

Garden Torches

Bistro Set - currently on sale!

Beer Garden Bench set

Plant Hangers

Terracotta Plant Pots

Concrete Sealer

In Streets
Comment
← Newer Posts

POWERED BY SQUARESPACE