• Home
  • Services
  • Projects
  • Blog
  • Contact
Menu

VESSOUL DESIGN

Street Address
City, State, Zip
Phone Number
Atlanta-based interior design + styling

Your Custom Text Here

VESSOUL DESIGN

  • Home
  • Services
  • Projects
  • Blog
  • Contact

Dreamy Bali-Inspired Bedroom and Plant Oasis

December 3, 2022 Katie Carpenter

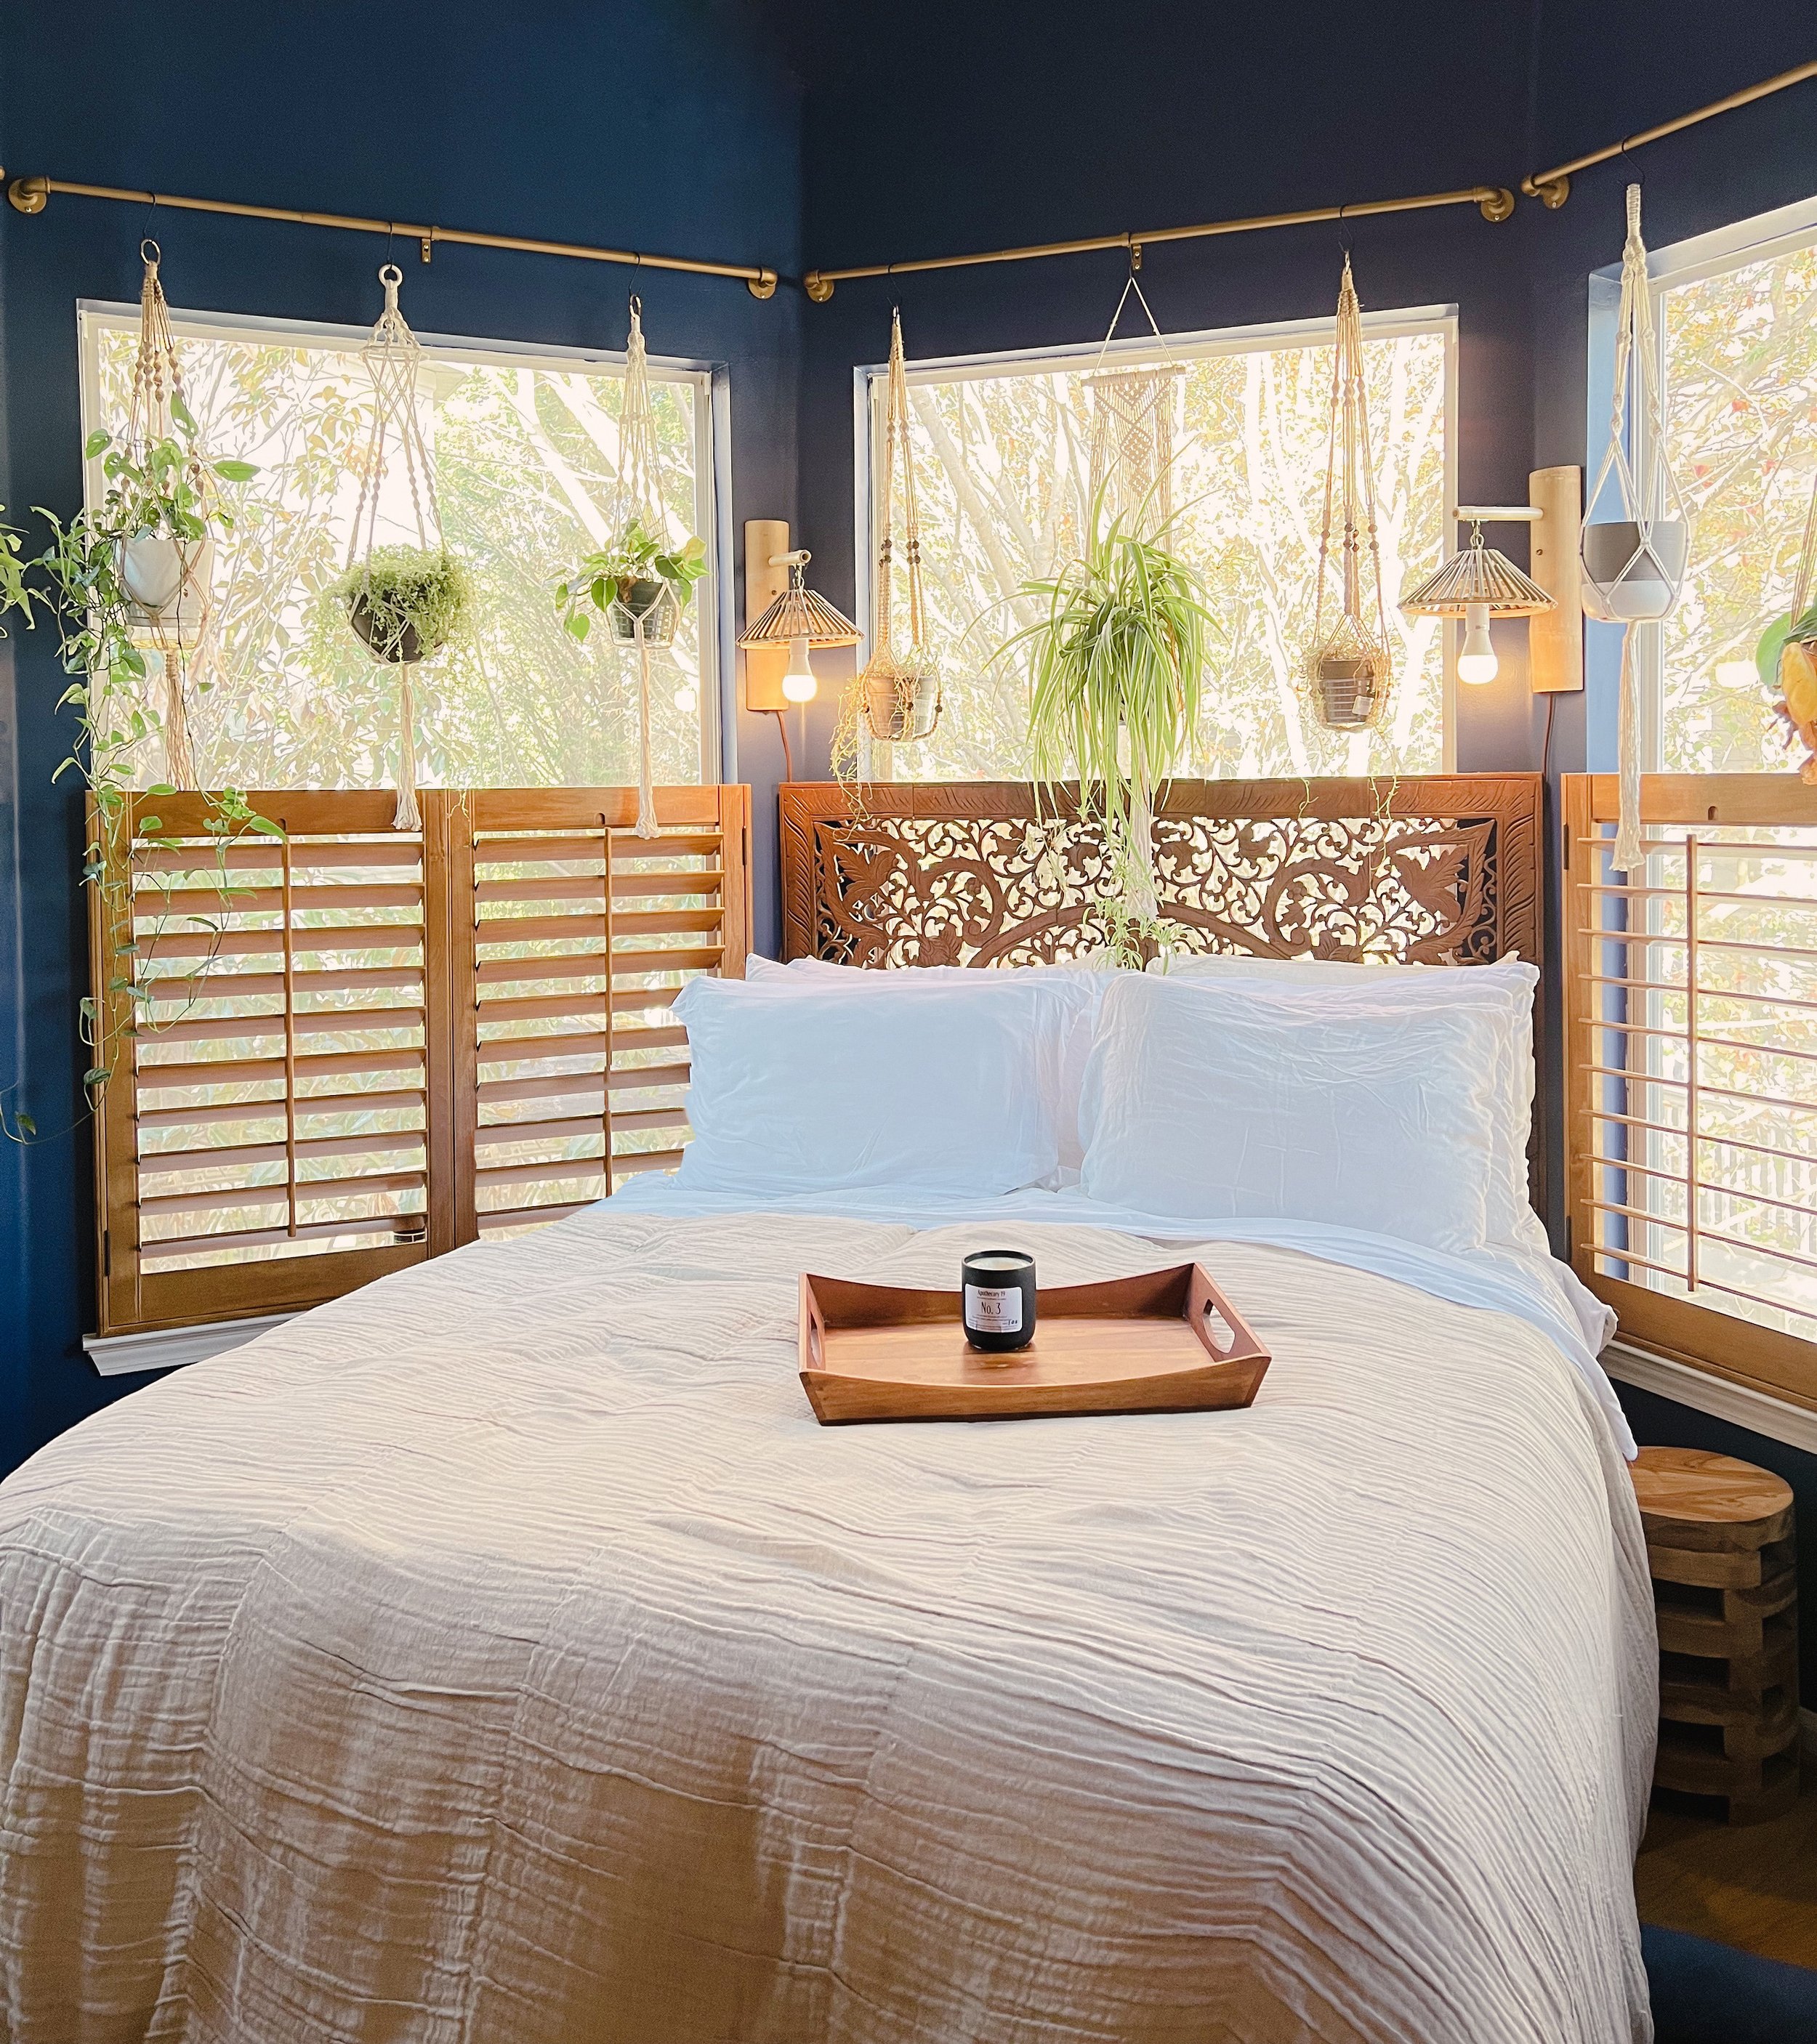
This bedroom is tropical oasis DREAMS. My client was blessed with what she described as a ‘Princess Tower bedroom,’ with beautiful angles, a vaulted ceiling, and tons of windows.
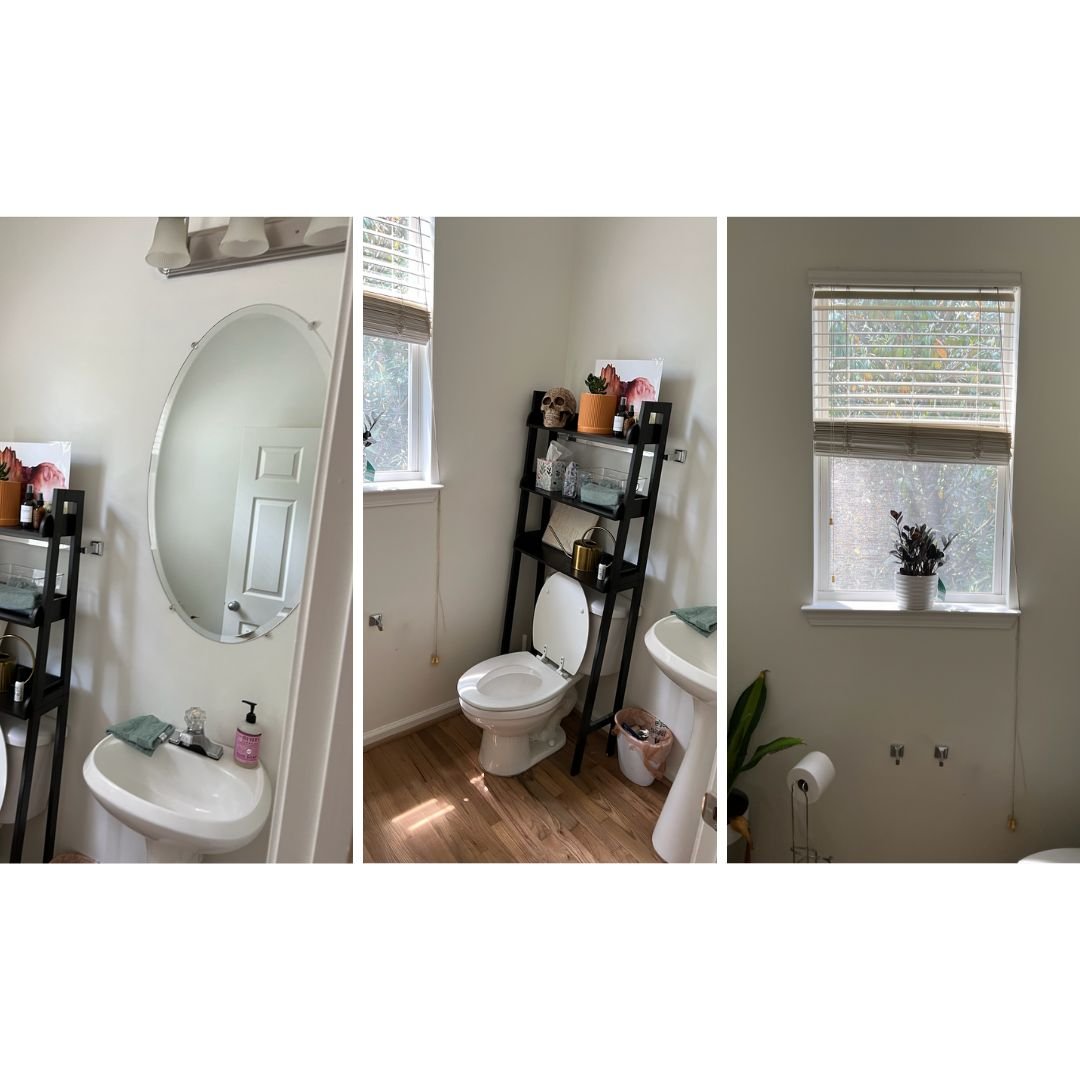
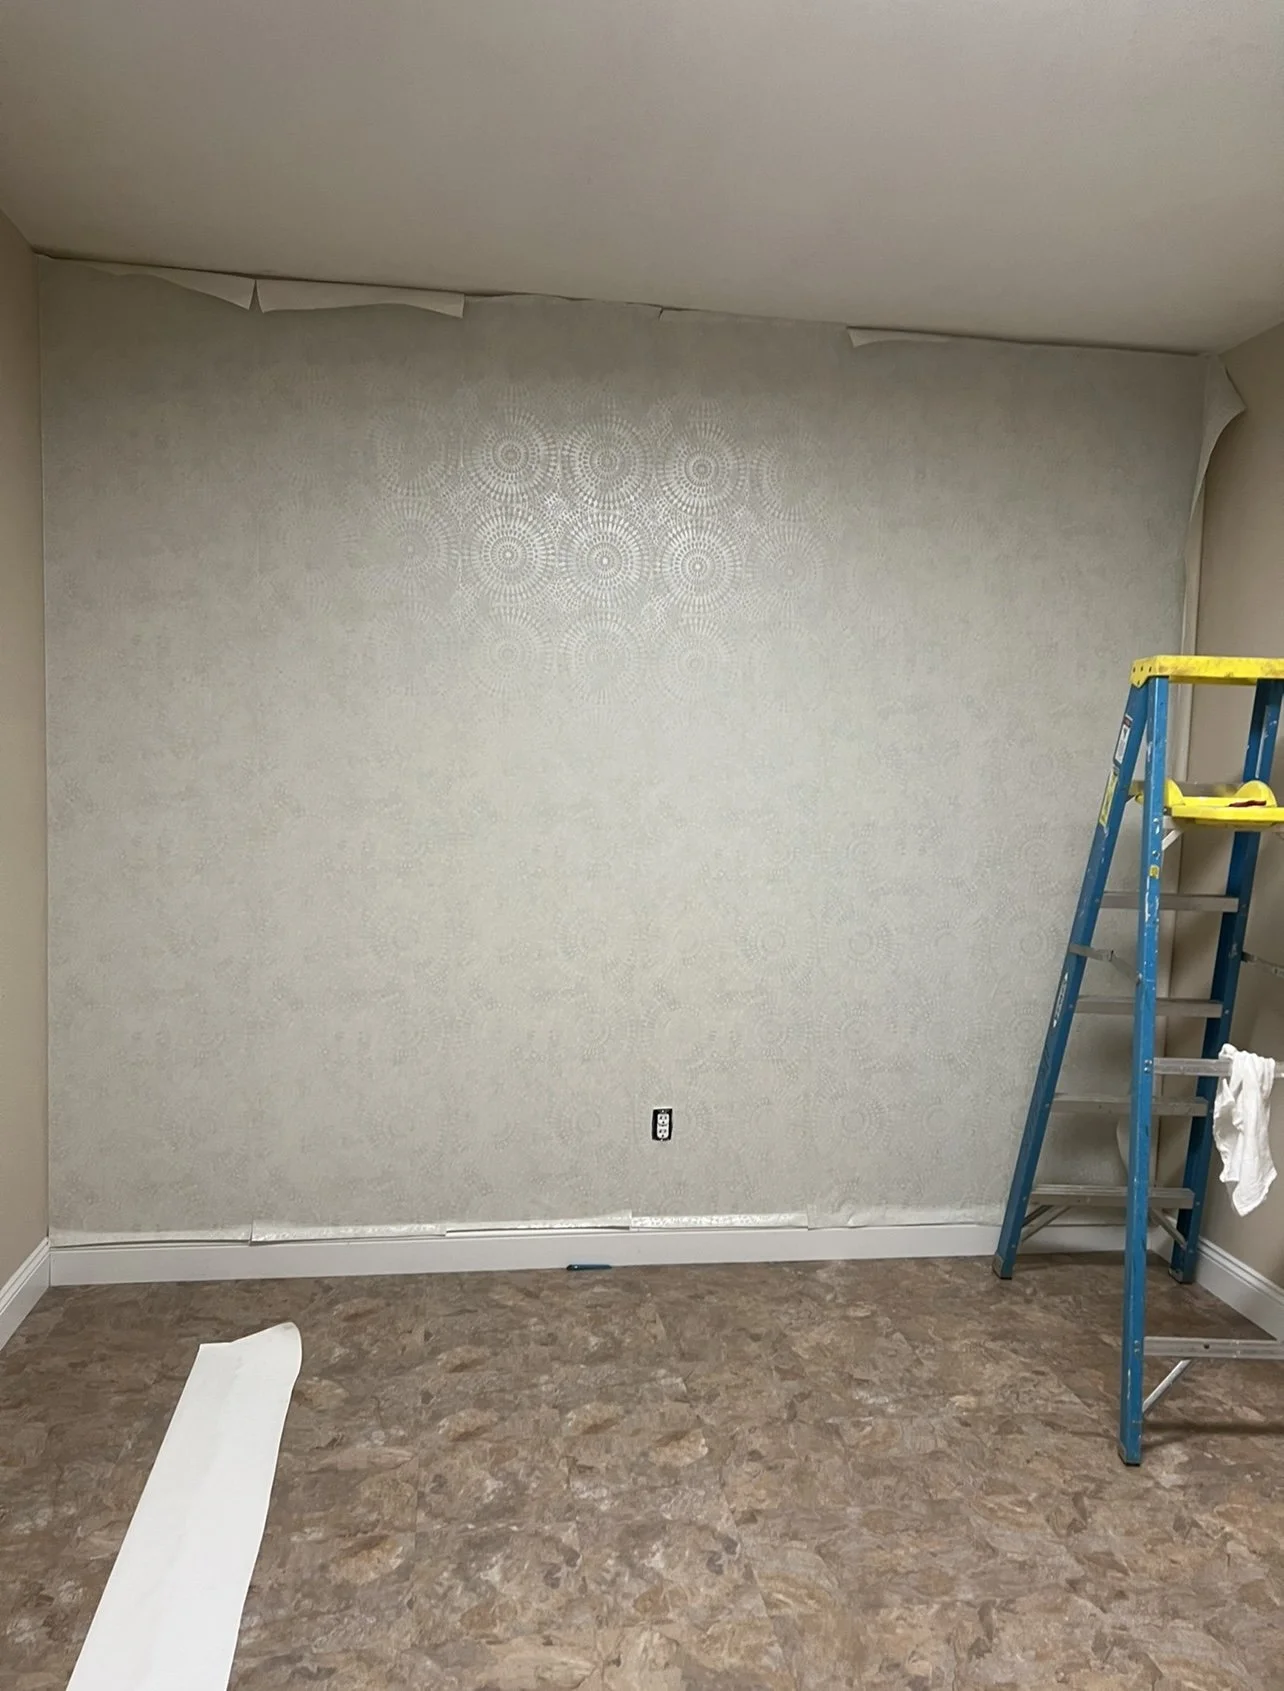
Screen Shot 2022-12-02 at 2.34.56 PM.png Screen Shot 2022-12-02 at 2.36.05 PM.png Screen Shot 2022-12-02 at 2.36.17 PM.png

Before.

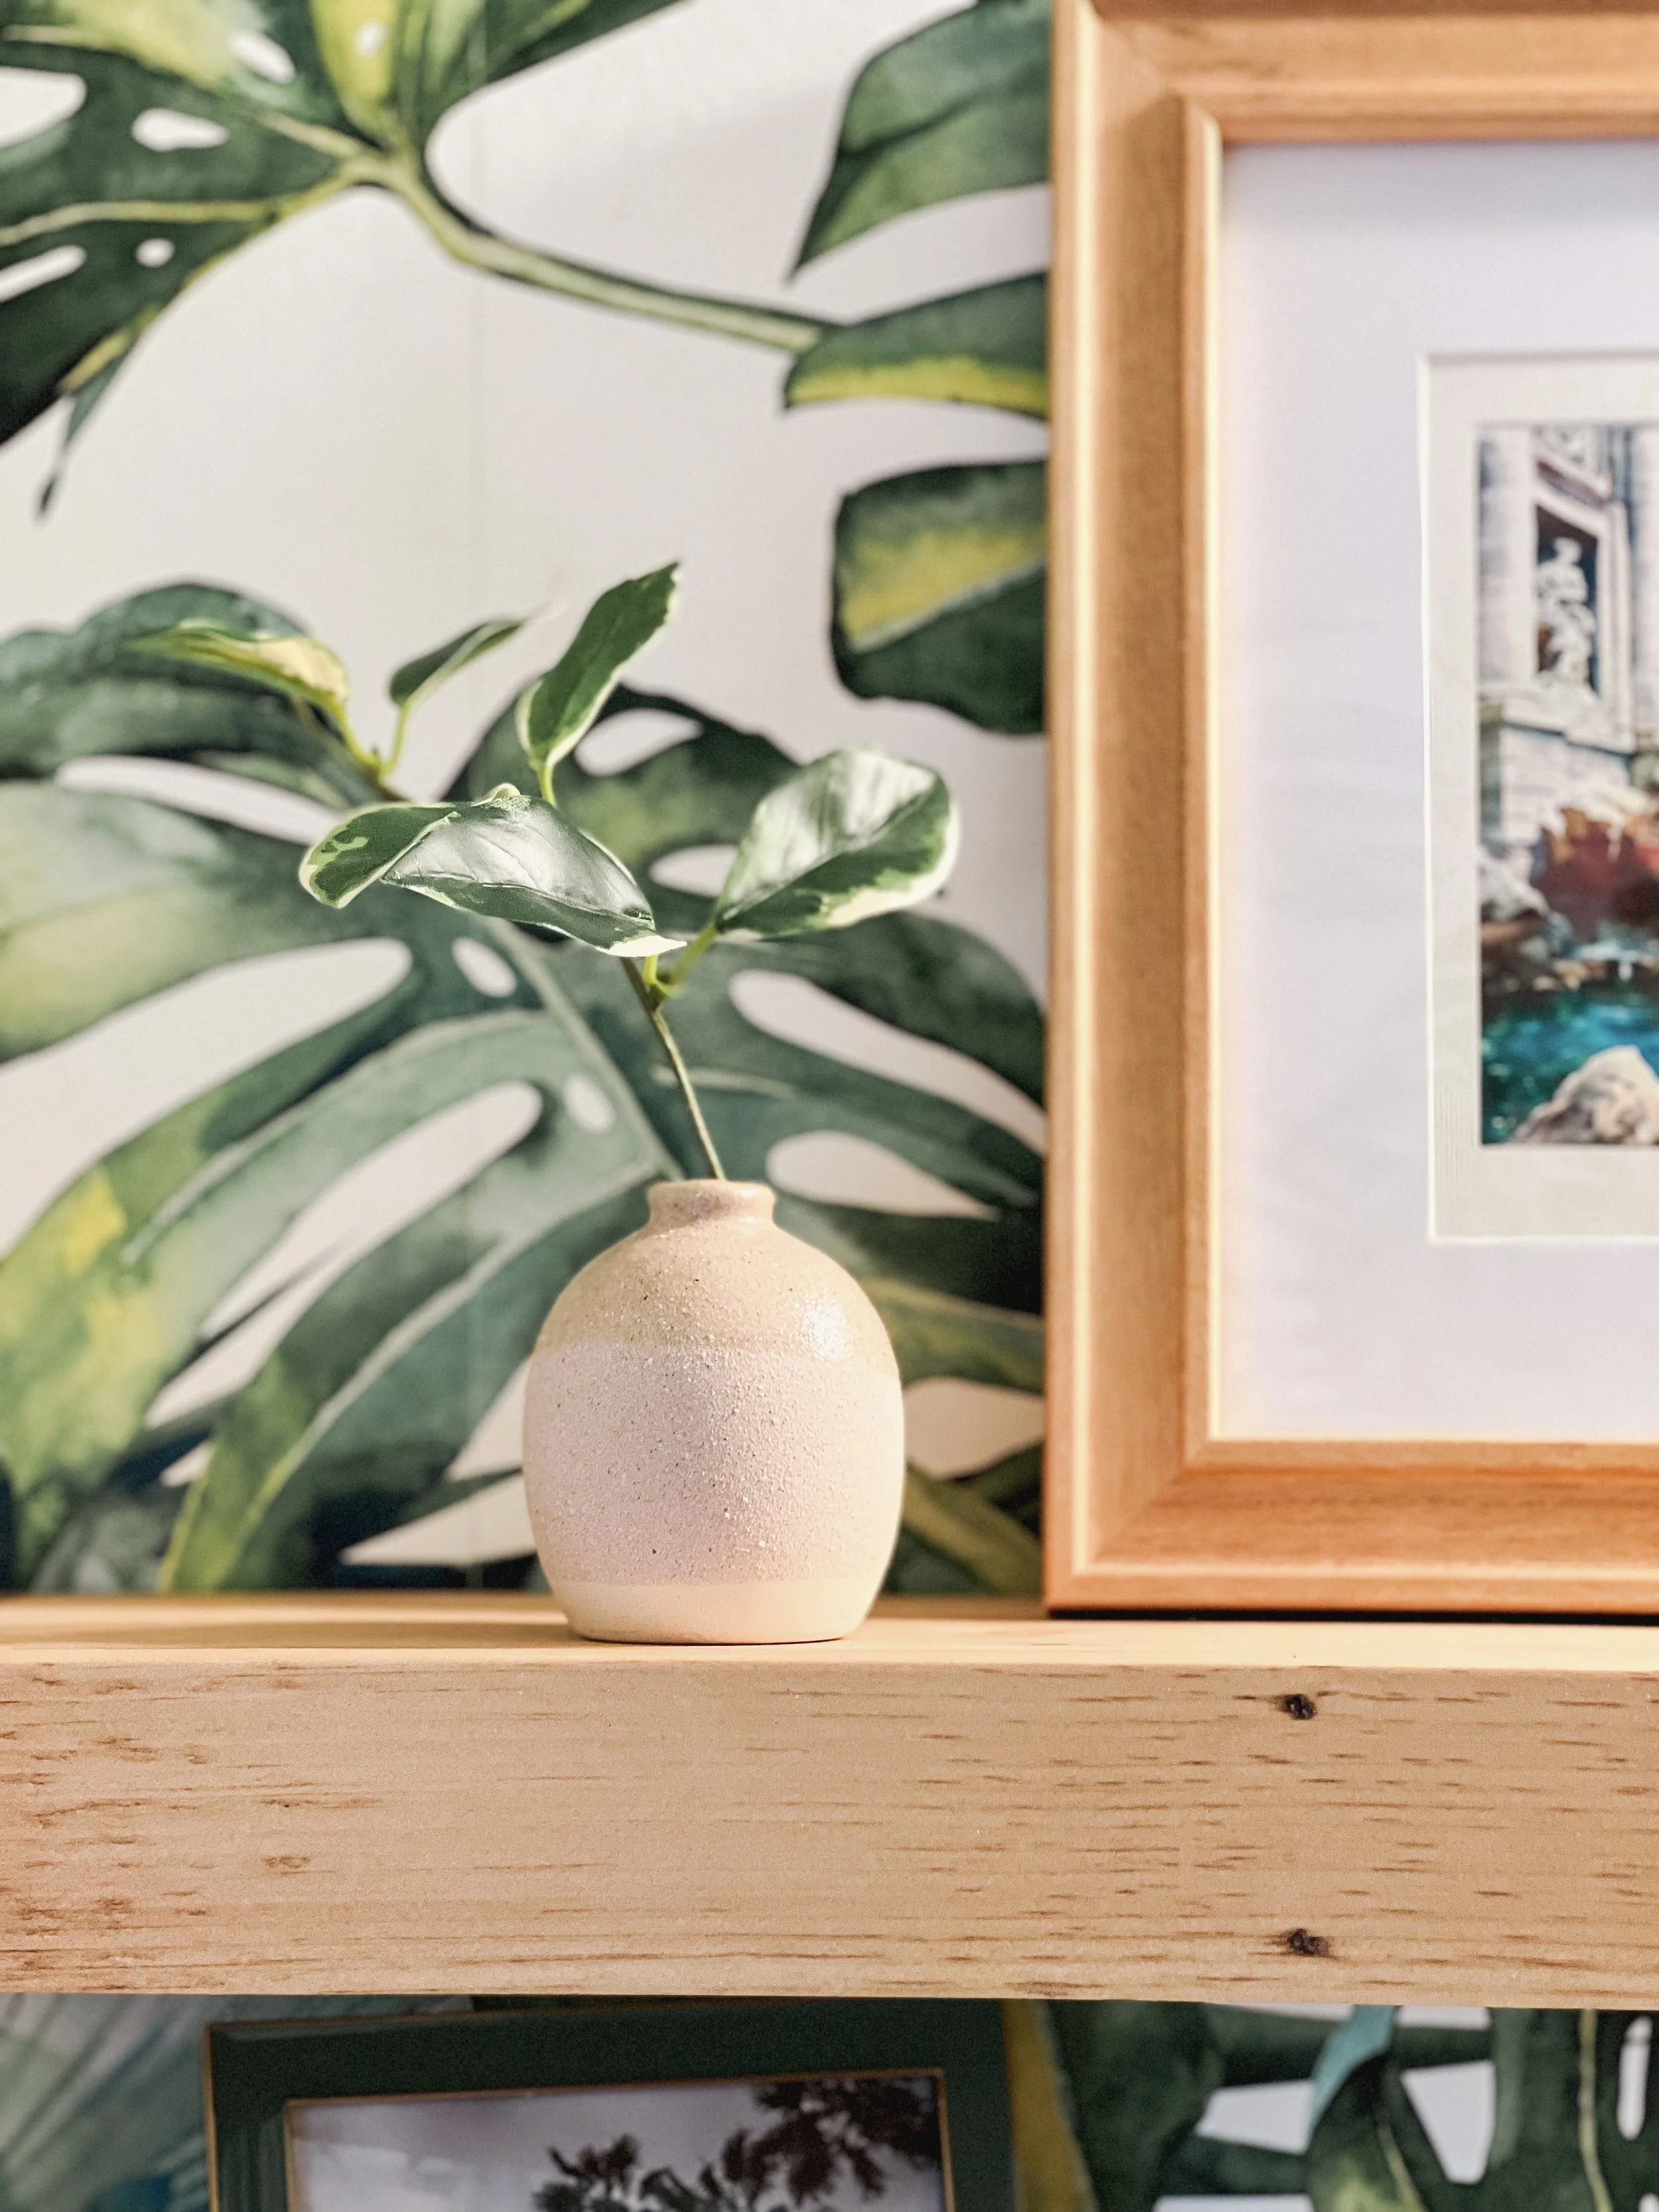
She’s also Mother to tons of plants. I knew I wanted to incorporate her plant babies into the design, but we had limited floor space to work with. So - we did what made sense… moved it all up!

The design.

Since she gets such great light and only needed privacy on the bottom of the windows, I thought some natural toned plantation shutters would work great, with plants hanging down so she feels like she’s in an actual rain forest.

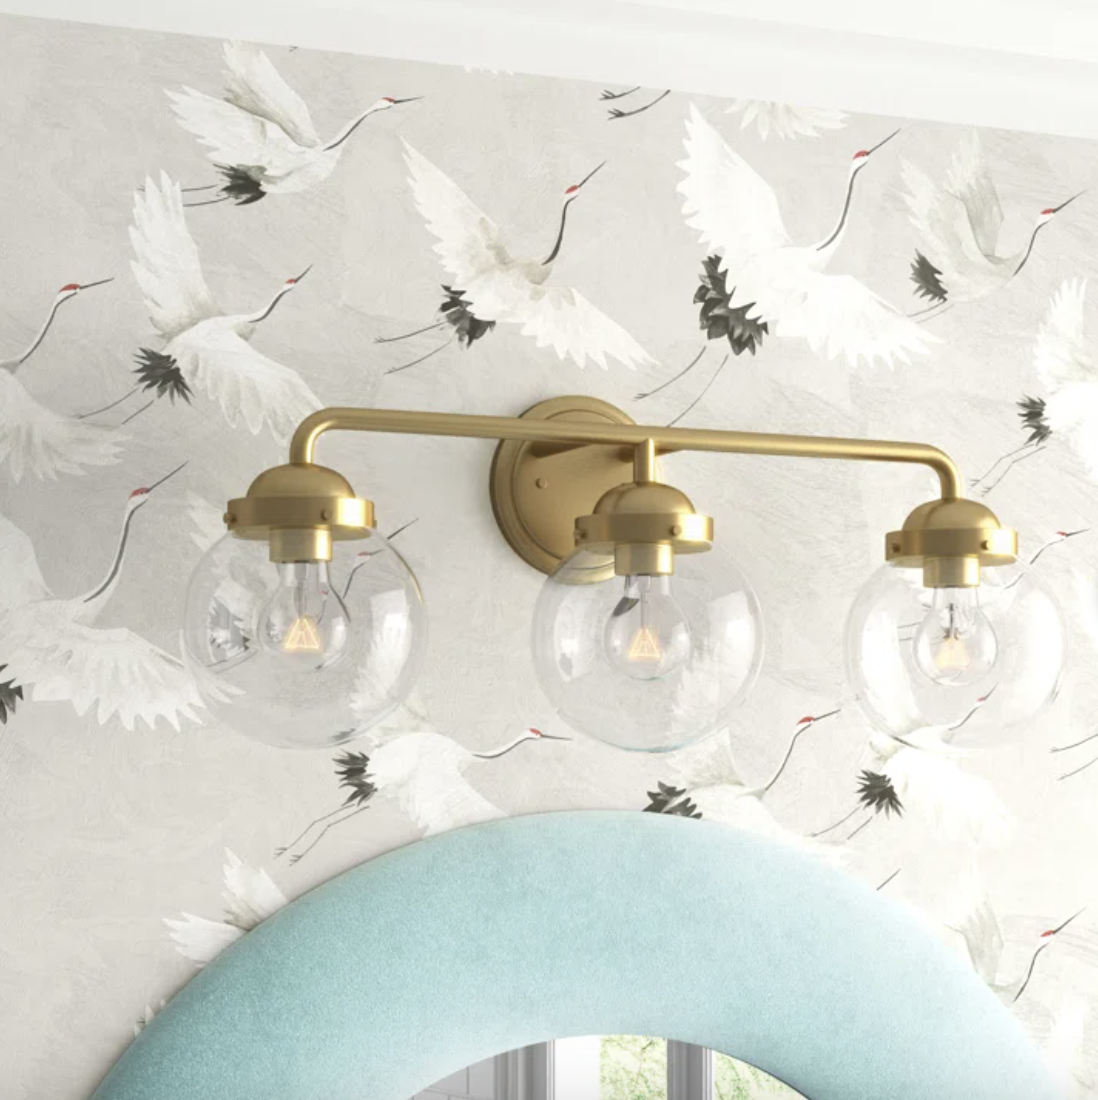
We used these curtain rods.

Linked in photo

These rods were perfect because they were adjustable, as not all of her windows are the same size. They also gave us the clearance from the wall we needed, and they had that perfect lived-in, aged brass finish.

The plantation shutters were measured, built, and installed by a local company, Acadia Shutters. They did a beautiful job.

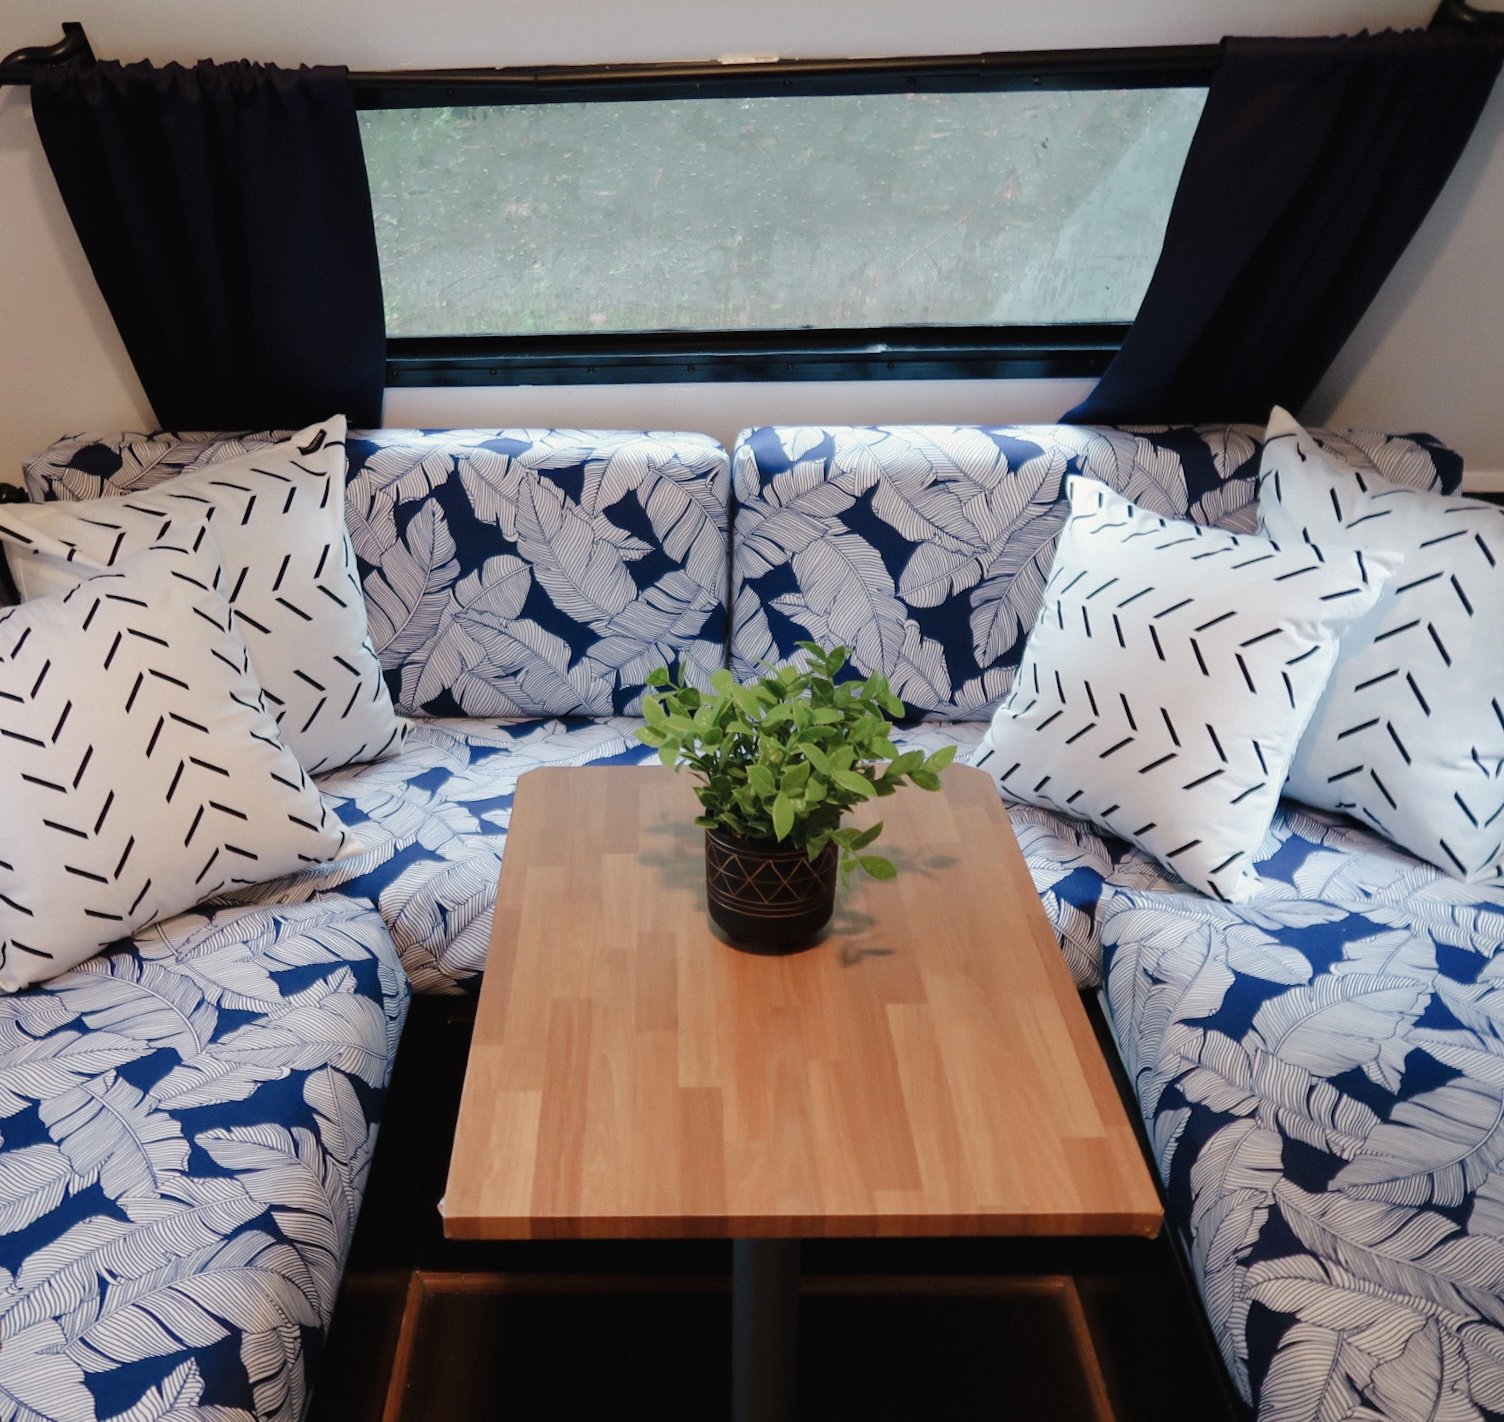
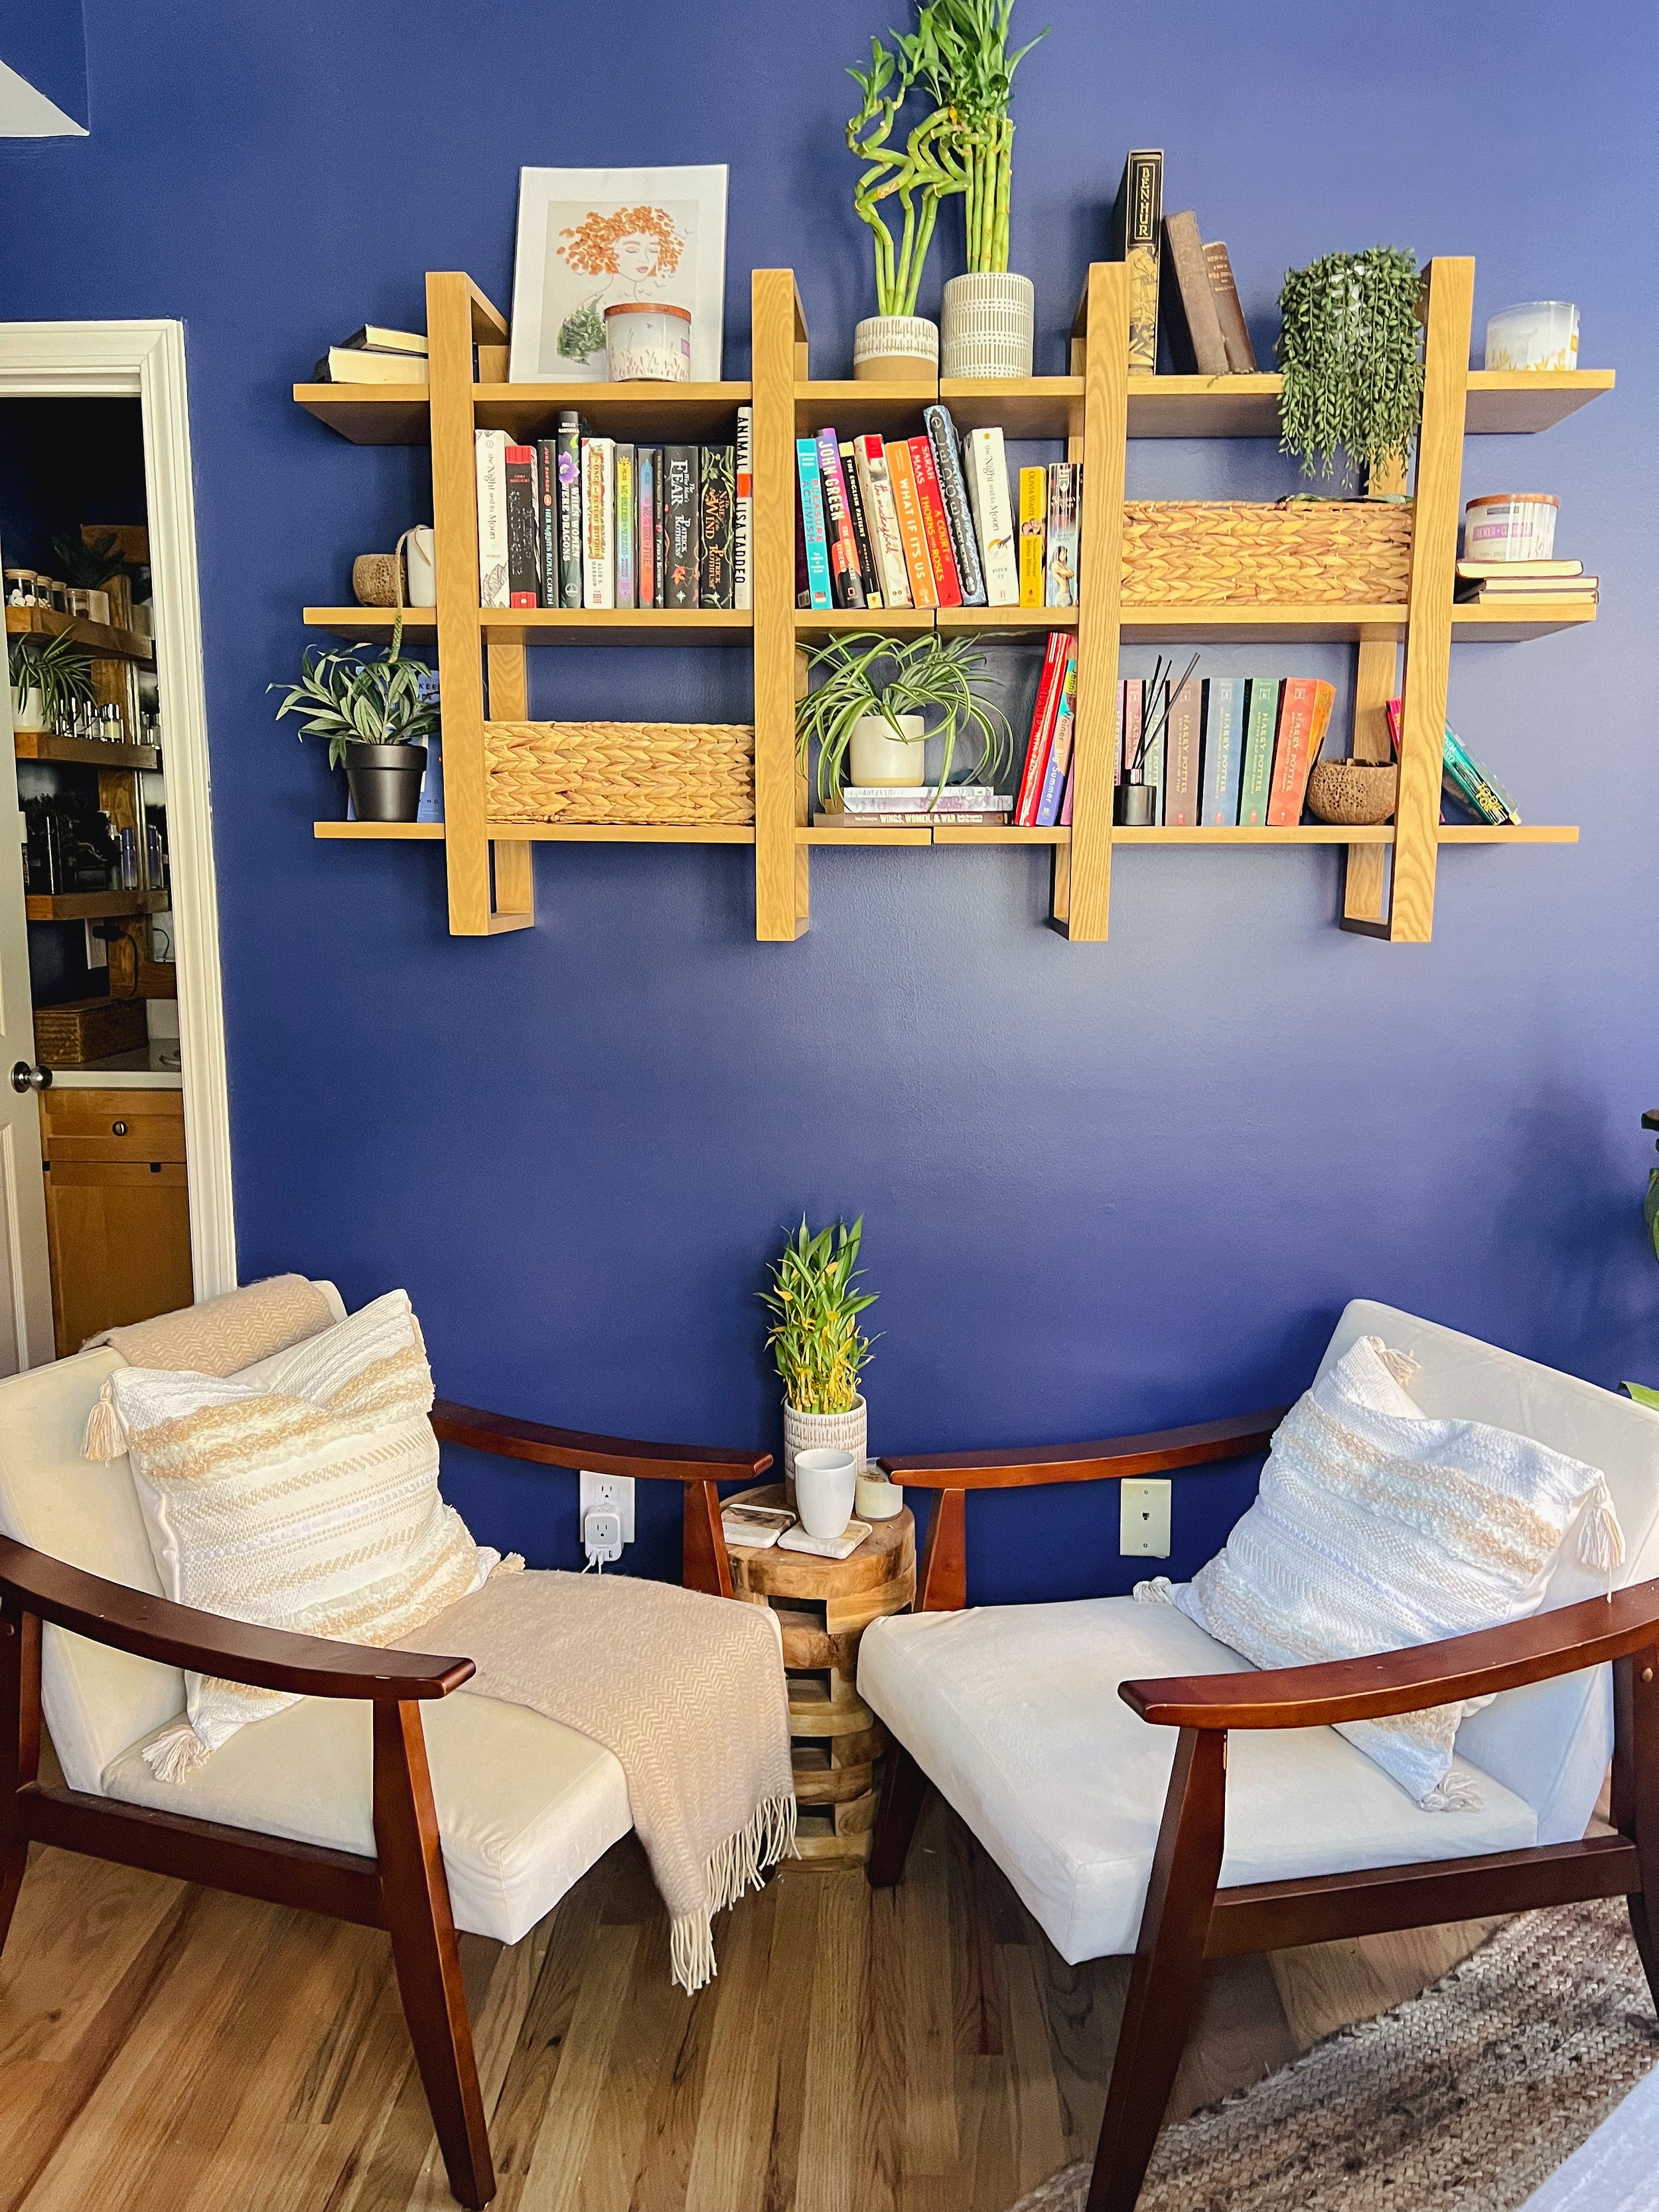
We were also able to create a two person sitting area, while still leaving room for a desk. I’m always a fan of mounting TVs, especially in tighter spaces to make more room for other essentials.

Overall, my client is thrilled with her beautiful and peaceful space. I would definitely live here given the chance! <3

LINKS:

  • Curtain rod for hanging plants

  • Bedspread

  • Desk

  • Desk chair

  • Accent chairs

  • Headboard

Comment

Favorite Pillows of the Season

July 22, 2022 Katie Carpenter

Loving the color pallete right now!

Prints are very in right now, so are warm pinks/peaches, greens, and you can never go wrong with neutrals.

Cream is preferred these days because it’s a little softer on the eyes than bright white.

It’s easy to mix and match, too!!

Just take a print + texture + solid (pull from the print colors). I like to keep two out of three pillows in similar sizes and then toss in a round or a long lumbar. Check out some of my favorite combos!

SOURCE LIST:

  • Cheetah Print Pillow

  • Cream + Rose Clay Dome Pillow

  • Embroidered Blossom Pillow

  • Popcorn Grid Cream Pillow

  • Tufted Tassel Pillow

  • Green Velvet Lumbar Pillow

  • Yellow Cotton Pillow

  • Round Velvet Pillow

  • Pink/yellow Colorblock Pillow

1 Comment

Re-cover Old + Ugly Cushions (removable + no zippers!)

July 19, 2022 Katie Carpenter

I was tasked with re-covering the smelliest and ugliest RV cushions. I wanted them to be removable but not have to worry about the headaches of sewing a zipper - so made these little pocket cushion covers, and you can too!

SUPPLIES:

  • Seam ripper

  • Foam w/ cotton batting on one side

  • Pins

  • Fabric Scissors

  • Sewing machine

  • Thread

  • Bobbin

  • Bobbin threader

  • Sew-on snap buttons (if you have an extra long cushion)

Before. Gross.

STEPS:

1.) Use a seam ripper to take off your old cushion covers. (It’s MUCH cheaper if you can find already existing cushions; foam + cotton batting can get expensive). Carefully put the seam ripper between a seam and pull up. Continue along until you’re able to slip the old fabric off.

2.) Lay out your cushion on the ground. Fold your new fabric over it. You want an overlap of about 2 inches of fabric in the center, so use your pins or draw a line with chalk so you know where to cut. Cut your piece of fabric.

3.) Fold your right side up of fabric on this center edge over approximately 1/2 an inch to create a hem. Pin along this line on both sides. Sew along the pins. Repeat for both sides.

4.) Place your fabric back around your cushion, but this time, inside out. Overlap the hems you just sewed. Pin into place on the cushion to help with next step.

5.) On either small end, pin in a straight line two inches down from the top of the cushion, parallel to it. Repeat on both sides (you can cut off the extra fabric you have at this point on the ends).

6.) Take the cushion out. Lay it flat to make sure your line is straight and you don’t have any folds in the fabric you don’t want. Sew along the pins on both sides.

7.) Place your fabric on your cushion again, still inside out. Pin a straight line at all four corners, perpendicular to the seam you just sewed. Make sure you pin the depth of the cushion. Remove fabric. Sew each line.

8.) Flip the fabric right side out, and place it back on your cushion. You may have to bend it because it should be tight fitting. You’re done!! (Unless your cushion is really long, like one of mine was. I sewed three snap buttons to make sure the fabric stayed tight and closed).

Upholstery fabric I found. $9.99 a yard is a pretty good price for this heavy duty fabric!

Step 2, after I seam-ripped my old fabric off. I folded the edges up so there was approximately two inches of overlap.

How the back side should look at the end. The foam is overlapped and completely covered. Notice, it’s not perfectly straight!! I don’t always love exactly measuring, but luckily, this works fine for a side no one will see!

How the edges look.

If you want a video version, check out my tutorial on Instagram.
And that’s it! A perfectly imperfect, but pretty simple/functional way to update some old cushions.

Comment

Modern RV Makeover (DIY)

July 12, 2022 Katie Carpenter

Paint, geometric backsplash, stick on butcher block, and updating the cushions and pillows to a modern print transformed this trailer.

#VanLife is all the rage. Who wouldn’t want to trade all their worldly possessions for a life of nature and freedom?! I totally get it. But the RV designs, especially the dated ones, are pretty boring. Black and tan and gray, oh my.

My friend found this trailer on FB marketplace for a good deal, but it needed a lot of TLC.

Before. Dated and dingy.

Don’t get me started on the pattern of these cushions!

I know this client wanted to get the best bang for their buck, so I set out to design a space that would look very different but still be affordable.

I hoped to create a gender-neutral space that was still modern and felt cozy + playful. Here’s one of my very early mood boards.

And here’s what we did.

RV RENOVATION:

  • PAINT - The goal was to make the space seem as large as possible, so the idea was to do white upper cabinets/ceilings and dark charcoal lowers. We used “SHERWIN WILLIAM’S IRON ORE’ on the bottom and matched the existing white with a warm white paint. It required several coats with dry time in between. We hired out for this.

  • BACKSPLASH - You can’t have a kitchenette without a great backsplash! I found these gel sheets on Wayfair, and they were on sale! The client installed these.

  • BUTCHER BLOCK - This is literally $7. Completely faux, this contact paper is so affordable! Also stick-on, the client installed this too.

  • CUSHIONS - I’m going to detail these in a separate blog post. I actually re-used the existing foam, seam-ripped, and recovered with a playful-patterned upholstery fabric. No tricky zippers required, but still removable!

  • TABLE INSTALL - Client came up with this idea, and it was smart! A lot of more modern RV’s have built in tables, so he had a metal piece installed and table built that collapses and goes underneath the dinette set when you need to turn it into a bed. He covered this in the butcher block contact paper as well.

  • REMOVABLE FAUX HANGING PLANTS - We didn’t want to drill into the shell, so I found these sticky hooks, and we got faux plants in plastic containers.

  • MUG HANGER - To add more detail, storage, and coziness, this screwed on underneath the cabinet. We tricked it out with camping-safe enamel mugs.

  • PILLOWS AND THROWS - The ultimate way to make a space cozy is adding in some textiles. We opted for bleach-able white (as the client plans to rent this one), with some other neutral accent colors.

SHOPPING LIST:

Paint

Backsplash

Butcher Block Contact Paper

Faux Hanging Plants + Hangers

Stick-on Hanging Hooks

Mug Hanger

Towel Hooks

Mugs

Pillow Covers

Quilt

Rug

This was a very affordable way to make a big impact on this space!! I think it’s absolutely charming now. Would you stay here?!!

Comment

DIY Tropical Bathroom Renovation

June 23, 2022 Katie Carpenter

This was a fun one! Although a lot of the fixtures were selected ahead of time, I ended up doing a good amount of the grunt work and making adjustments when we had issues arise.

BEFORE. Builder grade mirror + light fixture + vanity.

This bathroom needed some love. Basic, is what we call her. She had a boring vanity, outdated light fixture, and a completely non-functional toilet paper holder.

My clients wanted a fun, statement bathroom, and they’re huge plant lovers. So we got to work.

1.) Remove hardware/light fixtures.

2.) Sand down or fill any areas that will show through wallpaper. You can use 220 grit sandpaper and wood filler.

3.) Install wallpaper. Follow wallpaper instructions! I personally DON’T like working with peel and stick - it’s hard to move around. I like the paste. You cut your piece (or some come pre-cut, like this one), paint on the paste with a brush pretty heavily. Fold the ends in to the center to ‘book it.’ Leave for 5 minutes. Place on wall, and smooth down with smoothing tool, paying extra attention to the edges. I like to wait til it’s all dry, and then I come in with my razor and smoothing tool to cut a clean line on the ceiling.

4.) Trim + Molding + Beadboard. I hired a handyman for this. We figured out how high we wanted the top of the beadboard and trim to go, then subtracted the inches the beadboard sheets come in (typically 48 inches), and were able to figure out the rest of the real estate we had left from there. He used a saw to cut panels and the trim, and attached with a nail gun.

5.) Caulk + putty + sand. He filled in the nail holes with some caulk, or wood filler would work as well. He caulked around the top of the trim and the wall to make it a clean seal. Once dry, we sanded down the wood to make a flat surface for painting.

6.) Tape off the wallpaper + floor with painter’s tape. I’m a bit of a messy painter so this is any important step for me to keep clean lines!

6.) Prime the raw wood trim + beadboard. This is a step that my painter friend won’t let me skip! It truly does make a difference when you prime.

7.) Sand any other areas. Just double check by running your hand along the surfaces to make sure everything is nice and smooth.

8.) Paint the trim and beadboard. We used a white trim paint that already was used in the house for door frames. It has a gloss to it so keeps a cohesive look and also easier to clean. I did two coats, waiting til it was dry in between.

9.) Re-install toilet, new vanity, light fixture, roman shade, and mirror. Handyman did this!

10.) Attach new toilet paper holder, towel holder, and floating shelves. A great way to test out the position of toilet paper holders, towel hooks, etc, is to use painter’s tape in the proposed spot. Test it out, see how it feels and if there’s enough room/is functional. Better to change your mind when it’s tape VS screws in the wall!!

11.) Style the shelves, sweep up your mess, and enjoy!

SHOPPING LIST:

Wallpaper

They create the perfect size for your wall.

Click here

Floating Shelves

Custom floating shelves in various wood tones.

Click here

Blue Vanity w/ marble top

Affordable and very cute!

Click here

Vanity Light

This is under $100!

Click here

Round Mirror

Great price for the mirror - comes in various sizes and gold or black.

Click here

Brushed Gold Faucet

Comes in matte black or gold. Currently on sale for $100!

Click here

Gold Open Hand Towel Bar

Super elegant.

Click here

Gold Toilet Paper Holder

A classy, modern design.

Click here

Roman Shade

Comes in a variety of colors.

Click here

Beadboard

A very easy way to add details to your walls.

Click here
Comment

Dresser Do-over: Easy Furniture Flip

June 13, 2022 Katie Carpenter

Take a dresser from drab to fab for under $50!

When I get a bottle of wine, I like the good stuff. But that doesn’t mean I wanna PAY for the good stuff. So I look for deals (and go to Trader Joe’s a lot).

When it comes to furniture, I ALSO want the good stuff. The well-made, unique pieces. But not the price tag. Quality pieces can really run up your bar tab! I mean, credit card.

Comparable black four and five drawer dressers, listed at over a thousand dollars.

Some comparable 4-5 drawer dressers that would make a dent in your wallet.

And as for the cheap stuff? Composite ‘wood’ is so 2010 Ikea. The beauty of actual wood is it can grow and change with you, you just have to take care of it and give it a little TLC now and then. :) And then you can paint, strip, stain, and paint again!

This was a New-To-Me dresser from Facebook Marketplace. I’ll show you step by step how we took her from drab to fab.

Before. Image from the FB marketplace listing.

MATERIALS NEEDED:

  • electric sander

  • sandpaper (we used 220 grit)

  • oil-based stain of your choice (we used Golden Oak)

  • furniture paint (used Shabby Chic “Black Liquorice” chalk paint in a Matte finish)

  • furniture sealer (I used Shabby Chic Jolie Finishing Wax)

  • inkjet printer + printer paper

  • Mod Podge

  • lint free cloth + rag

  • large paintbrush

  • craft paintbrush

This water stain was much peskier than we thought! But - we adapted and decided to paint, which we ultimately love.

STEPS:

  1. Remove drawers.

  2. Unscrew knobs with a screwdriver or screw gun.

  3. Sand piece with orbital sander. Go slow and steady. (This is for stained wood, wood that has paint will need different prep!)

  4. Once it’s sanded to expose raw wood, vacuum/wipe down dresser to get rid of dust. We realized at this point that no amount of sanding was going to help with a water stain on top, so instead of staining it all, we decided to paint.

  5. Follow stain instructions. We brushed on stain with a paintbrush and then wiped in the direction of the grain with a rag after leaving on for a few minutes. We used Miniwax’s “Golden Oak.”

  6. White wash, if you want! I hoped for a little bit of a paler color than the Golden Oak stain gave us, so after staining, I mixed a little bit of white paint in water. Start with a little and add until you get your desired level of color.

  7. Paint your wood. I used Shabby Chic in ‘Liquorice,’ a black color that still has some blues/grays in it. Less is more.

  8. Touch up paint. Since there were so many grooves on the sides, I did this step a few times, and used a small craft paint brush. I also had to do about 4 coats on top of the water stain! Let paint cure for the recommended time.

  9. Seal. I used a clear finishing wax and followed instructions. Used a brush to apply the wax, and wiped off excess wax with a cloth. This takes 2 weeks to cure. For faster cure times, use a clear topcoat.

  10. Find the design you want for knobs. I wanted something with gold accents, and ended up using a Canva design with a dark charcoal background.

  11. Print your design. I printed the design on two full pages of printer paper, which left me plenty of real estate for 10 knobs.

  12. Paint knobs if needed. I ended up painting the knob sides the same color as the sides so they would all blend together. I also wanted a more ‘seamless’ look between where the paper ends at the front of the knobs to make a more cohesive look.

  13. Cut out design. For this part, I held up the knobs on top of the paper I was cutting, and eyeball added about 1/4 of an inch around the sides. You can also trace the knobs and leave 1/4 inch gap when you’re cutting.

  14. Apply the Mod Podge in a medium layer on the front of the knob.

  15. Place cut-out design centered on the front of knob to your liking.

  16. Apply another layer of Mod Podge over top and on the sides, smoothing down as you go. You’ll most likely have a few creases, which just adds to the textured look! You can use your fingers to press the sides down as well. Let dry.

  17. Re-attach knobs. And you’re done!

Stained cabinet on the left. White-washed cabinet on the right for a more “natural” wood look. Another alternative is simply seal the drawers with a clear polyurethane topcoat after they were sanded down. May try that next time!

Freshly painted and still drying. The coverage on this paint was pretty good, I used a medium jar (8.5oz) for this whole project.

Knobs in various stages. The Modge Podge goes on white but dries clear!

TIME REQUIRED + BUMPS:

Overall, this project took us a few days due to dry/curing time, but probably only about 8 hours of work.

There were some hiccups with the water stain, and I originally also wanted to change the kobs completely, as these were wider knobs with two screw attachments about an inch apart. I was hoping for sleeker, single screw knobs.

I tried filling in the holes with wood filler, and then sanding and staining them. BUT, alas… you could still very clearly see the wood filler. So. I pivoted to working with the existing knobs, and the result is still something unique, which was my goal!

Wood filler would’ve worked fine if we had decided to paint the whole piece, and we could’ve easily changed the knobs at that point. Next time!

Overall, we’re happy with how the piece turned out. It also gave us confidence that we have the ability to transform pieces that we like into pieces we love.

Youtube link below!

My instagram reel of this dresser do-over project is dresser do-over project is here.

In Furniture DIY Tags DIY projects, Home DIY, DresserMakeover, Furniture flipping, Boho decor, DIY boho decor, Chalk paint
Comment

Top Ten Memorial Weekend Sales (Fashion + Home)

May 26, 2022 Katie Carpenter

I was raised by a Coupon-er. A Garage-sale Guru. And finding a deal? It’s in my blood. But I also love nice things. Here are some of my favorite clothing + home stores with sales happening this weekend.


MADEWELL

Madewell floral strap dress.

I’m such a Madewell fan. I have some of their denim, comfy cotton tees, and accessories. Sale is 25% off EVERYTHING with code LONGWEEKEND.


GIRLFRIEND COLLECTIVE

Girlfriend Collective workout set, made from recyclable bottles.

I’ve bought two yoga sets from here, because they were made from RECYCLABLE BOTTLES! How cool is that?! Sale running from Thursday, May 26 - Memorial Day: 15% off any purchase of $125, 20% off $200, and 25% off $250.


EVERLANE

Everlane distressed cropped denim.

Very cozy and well-made, a lot of actors I’ve shopped for have loved Everlane. They’re having 25% off sale, and lots of other deals.


NORDSTROM

Free people one-shoulder floral bodysuit.

We love a good Nordstrom sale. On the pricier end of department stores, they have tons of brands I love, like Rag & Bone, Vince, and Free People. Their sale is up to 60% off this weekend. Get ‘em while they’re cheap(er!)


WAYFAIR

Wayfair mid-century modern lounge chair.

What in my house is not from Wayfair?! Just kidding. They have such a huge selection, it can be overwhelming at times. But USE THOSE FILTERS at the top, otherwise, you could be shopping for days. Up to 70% off select items, happening now.


SERENA & LILY

So many gorgeous pieces on their site, from unique throw pillows, beautiful pastel wallpaper, and furniture. The sale is for 20% off with code WAVES.


SOCIETY 6

I’ve been a fan of Society6 for a while. I love that they print artists’ work onto anything you can think of: yoga mats, mugs, bedspreads. I even know a few artists who have their work on Society6! From May 22-31, 30% off Wall Art, Home Decor, and Bed and Bath. 20% off other categories.


PARACHUTE

Parachute makes very soft n’ cozy home furnishings and decor. Their bedding feels like a hotel! 20% off sitewide is happening now.


BED BATH AND BEYOND

You’re not basic if you shop at Bed, Bath, and Beyond, I swear. In fact, I just bought some 100% cotton waffle hand towels from them last week!! Their sale is 20% off storage and organization, and 50% off sale and clearance.


URBAN OUTFITTERS

I love some Urban! Both clothing and decor. I’ve bought several things from some clients recently off of UO’s website, and their sale is up to 40% off furniture and decor.

These are several of my favorite stores with great quality + unique products. If you’ve been eyeing anything from them, now’s the time to pull the trigger! Happy shopping.

Comment

Easy Home Gym Makeover!

May 19, 2022 Katie Carpenter

Basement bore turned into a zen haven.

Full disclosure: this project was for my mother. Her gym is located in the basement, and it did not inspire working up a sweat - more like tears!

Pure function up in here!

I knew this would be a fun project. The catch? My dad only gave us a budget of $500. Cue record scratch.

Not to worry, though - I knew with some better lighting and some cosmetic upgrades, we could turn this into a yoga studio of her dreams.

The plan was:

  • Wallpaper a feature wall that you see from the door

  • New, brighter light fixture

  • Functional/pretty storage

  • Zen decor

We were originally going to paint the other walls, but due to the budget crunch, money crunch, and the wallpaper matching her existing walls perfectly, we didn’t have to!

Light fixture before. My dad replaced with a long fluorescent light.

I ordered two wallpapers on Wayfair, and my mom ending up liking this one. I prefer the pasted wallpaper because I find it’s easier to wiggle around and gives you a little more breathing room than peel and stick!

Conveniently, the wall color coordinated with this pretty well, so we opted not to paint.

This wall tool me about 4 or so hours. I needed:

  • wallpaper paste

  • scissors

  • paint brush

  • wallpapering smoothing tool

  • wallpapering knife

Basically, you brush the paste on moderately thick. (it’ll soak in). Then you book it - folding both sides into the center. Let it sit for about 5 minutes, and it’s ready to go on the wall! I was very precise with the first piece, keeping it square and level, but I just pattern matched for the rest of them.

Before I trimmed the edges with a wallpaper blade.

After that, we were on to decorating! Simple picture hooks were used to hang up the baskets and the picture. The shelves came with hardware to attach to the wall. And I put this crazy light together from Amazon that literally came in the tiniest box - I thought I’d accidentally purchased the wrong thing!

Love the glow of this lamp.

And that’s it! Super easy, pretty quick. Not a major transformation, but we shifted the energy in here for sure. My mom says she just walks into the room and stares at our lovely work!!

I’ve included product links below. :)

xoxo,

Katie

Wallpaper

Tall Zen light

Corner Shelves

Cube Shelving

Some of the other decor pieces like the picture frame, woven light, etc were bought from HomeGoods!

Tags homediy, easygymmakeover, homegym, wallpaperinghowto, easydiy, homegyminspo
Comment

$10 lamp refresh!

May 12, 2022 Katie Carpenter

Cute lamp but NBD, right? Scroll for the before.  

Sing the song with me…

$20 lamps purchased by my mother got a HUGE upgrade. Good price, but they were G-L-A-M-O-R-O-U-S  and belonged more in a Fergie music video than in my mom’s rich wood + stone fireplace living room. 

We purchased the spray paint from Michael’s, Krylon Fusion all in one in “Metallic Vintage Brass.” It was $9.99.

I taped off the important elements, and sprayed it outside on some newspaper. I like this paint because it has a slight metallic sheen, but isn’t overpowering. 

Before and during.

When it came time to put the shade back on, the original shade has a silver hue that didn’t quite fit anymore, so we swiped these vintage 70’s shades from her old bedroom lamps.

Sorry to say that this lamp + shade combo did not go together even back in the day!

We’re in love with the finished product. I want to steal one but I flew here, so… :D

All done for just $10! I included the link to spray paint below. Happy painting!

Metallic Brass Spray Paint

Comment

Styling your stairs

April 28, 2022 Katie Carpenter

These stairs leading to the basement got a cheerful lift! (Photo by Joy Ludwig)

When we bought our house, we loved all the modern appliances. It was a flip - but they did a pretty good job with the finishes. However - everything was pretty much black and white. I’ve realized my style needs a little more variety, so I’ve slowly been adding more color in.

Including - these stairs! One of our guest baths is downstairs and so is our laundry room, and I wanted to make people (and myself) smile as they came back up. It’s kinda like a hidden secret, because you don’t see them on the way down, just on the way up. Shh!

This was so easy and cheap to do.

Before. Dull and basic.

I wanted to get a variety of paint, but learned the smallest Sherwin Williams would sell would cost be over $20 a COLOR. But - the salesman did give me a tip. Lowe’s down the street sold samples that were small and much cheaper. And he was right - each color was only $3.99!!

These are the colors I chose.

It was important to me that I specifically got “happy” colors. So I went with Peach Blossom, Youthful Coral, Loveable, La Luna Amirilla, Neighborly Peach, and Afterglow.

I cleaned the steps before painting (cause we have three animals).

Tip: if you’re not sure of the order of colors, lay out the caps or do a sample streak to see how you feel about the combination! I played around with it for a bit before I landed on the color order. Check out a quick little video on my project below.

Overall, this project probably took me a total of 2 hours and cost under $30. Definitely worth it!

(Stair treads are from Wayfair. Also be sure to get some carpet tape so they don’t slide!) Linking here:

Carpeted Stair Treads

Carpet tape

Comment

Boho-Tuscan Patio Refresh with Stenciling

April 25, 2022 Katie Carpenter

Thrifted furniture + paint make the biggest impact on this patio!

An ugly concrete slab is especially uninviting. After living in this house for a year, I can safely say we NEVER used this space. Inspired by stenciling and the look of faux tile, we completely transformed this place into a tuscan dream spot, all for about $1500!

BEFORE. What an eyesore.

CLOCKWISE FROM TOP LEFT: Behr Concrete and Garage Epoxy in “Barrier Reef,” Stencil brush, Amazon three tier hanging succulent pots, rollers for rough surfaces, Rust-oleum Concrete and Garage clear finish topcoat, Royal Design Studios Stencil in “Supernova,” Macy’s Marley Indoor/Outdoor 3 piece Bistro set, deck boards for the HVAC unit cover (Lowe’s/Home Depot), Style Well 80 Qt. White Cooler with Light Brown Woodgrain.

Sadly, I didn’t take a lot of “during” photos.

But - for stenciling:

  1. Level out your concrete if you need to, repair cracks as best you can (we luckily didn’t need to do this.”

  2. Pressure wash/scrub concrete with outdoor concrete or deck cleaner. Let dry.

  3. Leaf blow/sweep to be sure the area is free of debris. Use a rough nap roller to paint first coat. Let cure the amount of time suggested.

  4. Leaf blow/sweep again. Do a second base coat. Fill in any areas that the concrete is showing through with a thick amount of paint to be sure it’s getting into the crevices. Let dry.

  5. Stencil time! Start from a corner. Don’t use a lot of paint on the stencil brush - I like to dab through a few of them with a dot of paint and then go back through to spread it out. If you have too much paint, it will bleed under and your design will not look sharp! But if there are mistakes - don’t fret. You can always touch-up or re-do them.

  6. I try and start the stencil in the direction I’m moving - ie, if I’m moving left, that’s the direction I’ll start because you want it to dry first. Overlap the design - I learned that the more I overlapped, the better the design looked but the longer it took! So you have to figure out what works for you. :) Let it dry.

  7. Be sure to sweep/leaf blow a final time. Then use a rough roller to do a final clear topcoat.

  8. Enjoy!!!

HVAC unit cover was built using deck boards.

For the HVAC unit cover, my dad ended up building this. He was a Carpenter for years, and I showed him a Pinterest photo and he made it come to life. He used deck boards and screws to make this - weather treated wood was obviously important since this unit is outside.

Do be cautious about covering the HVAC unit - it does need as much air as possible. We have about 10 inches in between the unit and the cover and there are also spaces between the slats. It simply sits on top of the concrete and slides out if we need to access it.

I bought plant hangers and terracotta plastic pots from Amazon to complete the look!

The copper fire torches were bought on Wayfair!

We already had the lights and attached them with screw-in cup hooks and a masonry drill bit. The bench is a Beer Garden Bench from Amazon, only $200, is collapsible, and can seat 6 adults!

The cooler was the perfect party addition - we put child friendly drinks on one side and adult beverages on the other! And no one was treking through the house to grab a drink.

Where to buy it:

Stencil

Paint

Cooler

Garden Torches

Bistro Set - currently on sale!

Beer Garden Bench set

Plant Hangers

Terracotta Plant Pots

Concrete Sealer

In Streets
Comment
← Newer Posts

POWERED BY SQUARESPACE